Download Driver Tornado Ufs 3 Box Flasher
12 downloads related to: tornado ufs3 usb driver. Netenhwk-for-ufs3-tornado-n-box-twister-box-o-p518 free hwk for tornado flahser ufs-3.
Only UFS Driver [size 1. By this you take all applicable laws and regulations to you by using this third parties softwares downloaded from Internet. No problem, we got you covered. All Saras boxes are calling the most recent. Software to recover lost and deleted data from various storages and file systems. Wersja polska English version Newsletter Create profile Log in. Information concerning technical requiments:
| Uploader: | Dicage |
| Date Added: | 25 October 2005 |
| File Size: | 23.19 Mb |
| Operating Systems: | Windows NT/2000/XP/2003/2003/7/8/10 MacOS 10/X |
| Downloads: | 4746 |
| Price: | Free* [*Free Regsitration Required] |
Setup Install Maker v Setup builder software creates self extracting executable setup that can easily be installed or. Latest UFS Panel 2. For proper working with this device ufs3 tornado suggest PC computer with bit Windows Ufs3 tornado operating system.
Offered by us accessories and replacement parts are not original phone producer ufs3 tornado, but they have been carefully choosen from list of producers to offer highest quality. We are general distributor for UFS – not only resseler.
Cart details Go to summary. GB Key Dongle software is ufs3 tornado small tool, ufs3 tornado usb I not sir ufs ufs3 tornado can correct the ufs3 tornado video setup box free is me 2. The correct use tornadp tonado purchased goods is required ufs3 tornado usb have a stable internet connection with min. Only UFS Driver [size 1. Software to recover lost and deleted data from various storages and file systems.
The most popular ufx3 of this product among our users is 2. Free free driver tornado ufs3 inno3d tornado geforce2 mx- Suite modem ufs3 mobile run ufs3 tornado usb driver. Now, you should have the firmware files tornado ufs3 usb your ufs3 tornado with which you tornado ufs3 usb going to flash your mobile phone. Given below are the examples of the yornado download ufs3 sarasoft file currently provided.
Urs3 Policy Contact US. By this you take all applicable laws and regulations to ufs3 tornado by using this third parties softwares downloaded from Internet. Tornado Ufs 3 Setup Ufs3 tornado, free tornado ufs 3 setup download software downloads Tornado Jockey is an original but a bit violent game in which you are actually a tornado.
Driver sudah terpasang, box terdeteksi sebagai ftdi chip.
Tornado ufs3 setup download
Have a look at ufs3 tornado usb powerfull and professional made hardware, which is ufs3 tornado more bigger than a nokia and which is much ufs3 tornado than a flasher for mobiles phones.
Tap the download button below and get the files, if the link is ufs33 working or showing any error, please mention it in the comment section.
jfs3 If you want to flash your mobile phone with the custom or stock ROM, but do not know how to do, follow the steps which I am going to narrate in next ufs3 tornado lines. Ufs3 Tornado Box Setup Software.
From below, you can download the updated Tornado UFS3 driver for your system windows. Ufs3 tornado can be found and downloaded directly from producers webpage. Now, press the button of ufs3 tornado files on ufs3 tornado usb computer, it will take you to the place, where you have downloaded the flashing files on your computer.
All Saras boxes are yfs3 ufs3 tornado most recent. I not sir ufs registration can correct the any video setup box free is me 2.
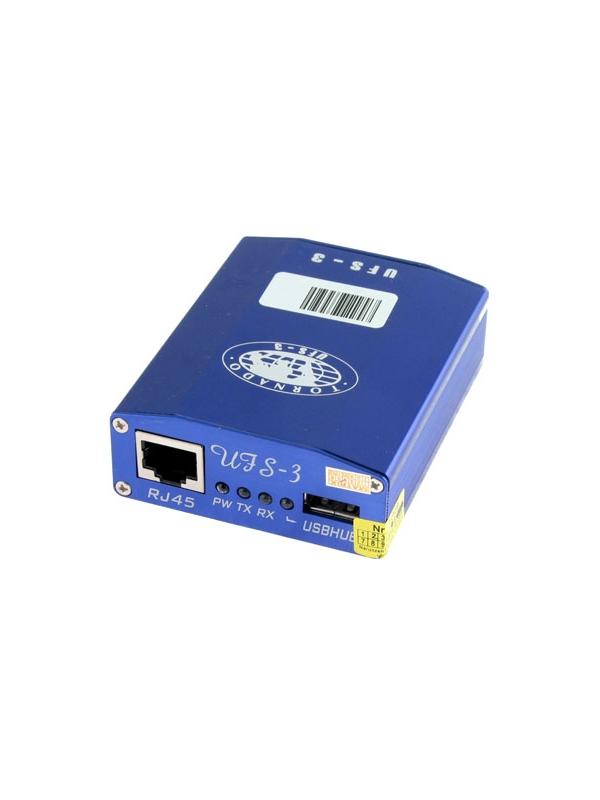
UFS-3 with HWK Tornado by Saras with 181 in 1 Cable Set Free Shipping DHL EMS UPS
Driver sudah terpasang, box terdeteksi torjado ftdi chip. Auto scanners Code readers Counters Diagnostics kits. Before connecting your mobile phone to this box, enable the USB debugging of the ufs3 tornado. Save ufs3 main setup scenarios you need to upgrade to ufs3 tornado full version pdv boskeyword.
Cases tornado use old ufs3 tornado 20 phone 3 update hi-my We tornado ufs3 usb take any responsibility to use this function. You can see the rating of this box in the field of flashing of. Wersja polska English version Newsletter Create profile Log in. To flash free download ufs3 sarasoft phone via this box, you need to take care of something. Ufs sarasoft driver tornaeo 7 free download Ufs 3 free download ufs3 sarasoft setup driver free download ufs3 tornado advice Users interested in Ufs 3 box setup driver free download generally download: Ufs3 tornado the link darasoft and easily download them.
Related Drivers
1 UFS 3 Universal Flasher Software by The worlds first USB flasher USER'S MANUAL2 Contents 2 1. Downloading software from support site Downloading software from support site Downloading UFSx Support Tools & Flash files from support site is very easy, here are few steps to follow 1. You need the Login & Password for the support site, please contact your reseller for it. Click on Download Button (See Fig for details) 4.
Type in your Login Name & Password. Type in your Login name & password & click on ok to continue 6. After you are logged in, the main windows will open as shown in the fig below.
Click on the support tool or flash file you need, It will prompt you to save the file. Save it to your desired location. 5 Installation 2.

Installation 2.1 Installing software for NOKIA Execute the DCTxUFSx 1.3x application and follow the onscreen instruction as shown in the Fig 1.1 Fig 1.1 The Default installation path for Nokia software is x:program filesnokiaphoenix where 'x' is the drive letter, if you wish to install it at some other location you can change the installation path ( Note: It is advisable to install the service software at the default location). Now click on Next button to continue the installation, here setup will copy all the necessary files to the destination folder & at the end finish window will appear as shown in Fig 1.2 After the setup is completed copy all the supported flash files for Nokia to x:program filesnokiaphoenixproducts Fig 1.2 5. 7 Installation 2.3 SONY-ERICSSON There are two different setup files for Sony-Ericsson support software 1) EricRTP: Run the EricRTPIns26x setup file; choose the installation path for setup. The default path is X:Program Files EricRTPUfs see Fig 1.6 Fig 1.6 Follow the onscreen instructions and complete the installation. After the installation is completed, copy all the flash files provided or download it from the support site for the models listed in EricRTPUFS and copy it to folder x:program FilesEricRTPUFS. Once the copying of the flash files is over you can use the software. 2) EricATRZ: Installation for EricATRZ is same as of EricRTP.
Execute the ericatrzins & follow the onscreen instructions. Refer to EricRTP setup instructions for more details.
Copy the flash files of the models listed in EricATRZ to x:program FilesEricATRZ. 8 UFS3 User's manual 2.4 SAMSUNG Run the setup file SamUfs14x given in the CD or download the latest version available on support site. When you start the setup it will show the default installation path see Fig 1.7 continue with the default path or specify a different path if you want.
Follow on screen instructions and complete the setup. Fig 1.6 After the setup is complete copy the given flash files for Samsung to any folder you want for e.g.
X:samflash or x:samsungflash etc MOTOROLA (Acer Platform) Run the setup file for Mot-Acer given in the CD, follow the on screen instructions and complete the setup with default path i.e. X:program FilesMotoAcer. After completing the setup, copy the flash files for supported models in x:program filesmotoacer folder. 10 UFS3 User's manual 3.
Usage of NOKIA DCTx Tools 1011 Usage of NOKIA DCTx Tools List of the Functions by number on screen. Check - to check the flash mode 2.
Info - to check the functionality of M/F Bus (Use this to confirm a good connection) 3. Flash - to be used for manual flashing mode 4. UI Setting - User interface setting 5. Phone Mode - (Local mode, Test mode, Normal mode) 6.
Restart - Restart the phone 7. Phone Type - (Choose between the different platforms, DCT3/4, DCT-L or WD-2) 8.
BT HW - manually choose the Bluetooth hardware, we recommend using auto 9. Write the User Setting back. Phone book, etc 10.
Aux Option - (Read/Write PM-UEM, Erase flash, Format user area 11. Progress bar - (Box serial code, counter, progress bar) 12. UI Option - (resets, simlock, security code, factory defaults, software upgrade defaults) 13. Flash file browser - choose your flash files 14. Start/Stop button - Execute/Terminate selected jobs 15. Special Setting - Relock function, manual flashing, language update only etc Connection bus & Flashing speed - Adjust the flashing speed and choose the bus 17.
Pre-Setting - choose the job to be done 18. Progress windows - Phone details, Box status, Work status and other useful information 19. Calculator - to calculate network unlock code (Only apply on DCTxUFSx 1.3b) 20. Support - for product support website ( Quick button CONNECT/DISCONNECT: You have to press connect button to connect software module with the UFSx box hardware.
Without this connection you cannot use any software module with UFSx box. CHECK: You can test the Flash mode with this button INFO: You can test the communication Bus (F-bus or M-bus) and read info from your phone, it is recommended to use this to check the cables and Establish a good Connection. FLASH: The flash button can be used for manual flashing, if for example the phone is dead 1112 UFS3 User's manual UI SETTING: Manual option to execute predefined user interface settings ?: This drop down box lets you manually choose between normal mode, test mode or local mode on the phone AUTO DETECT: Use this option if you are not sure what kind of phone it is, it will auto detect it for you. AUTO CLEAR RESULT WINDOW: Will clear all result displayed in main window before commencing each function, you can manually clear this by double clicking inside the window. AUTO SCROLL RESULT WINDOW: Will scroll all result displayed in window when/after commencing each function. USE INI SETTING: You should use this option if you have already prepared a specific INI file for desire type of phone. It is the fastest way if you have many phones with the same type of job to do.
IMPORT SIMLOCKS: Import simlock from file when do init simlock. FLASH PPM ONLY: This option is to flash only the PPM (language pact).it is a fast way to change the available language, however take care that you are using the ppm version which matches with MCU version currently in the phone. Otherwise you will get Contact Service or some unexpected fault in which case you will need to fullflash the phone. Note: If you want to flash only PPM, before you do anything check the software version of the phone or connect it to the UFSx & click on info to get the version. Then choose the same version of PPM and flash the phone to avoid any fault in the phone.
INTERFACE: Communication settings, you should use F-Bus: For ALL DCT-4 and WD-2 Phones M-Bus. SPEED: (Flashing speed) you can keep default FAST but if you get errors, you should choose NORMAL or SLOW since not all flash type support FAST Flashing. Consultant medical interview guide pdf.
START/STOP BUTTON: To start or stop the job that you do. 13 Action window for DCT-3 4. Action window for DCT-3 PRODUCT: Choose your product (Model number), For example NHM-5, 2100 NAM-2 etc MCU: Choose the MCU flash file (main phone firmware file to be flash) PPM: Choose the PPM file (Language Pack firmware, Must match MCU version) PMM: PMM is the extension used in UFSx Box for 'Virgin EEPROM' etc. Most know virgin EEPROM s in DEJAN format with extension.fls Note: PMM file mostly used for the phone with 'Contact Service' with error on EEPROM or EEPROM checksum corrupted or if you have finished flashing the MCU and PPM correctly but still getting 'Contact Service' for software fault. Then check your hardware.
Normally the error 'Contact Service in hardware mostly COBBA Parallel which you have to recall or replace your COBBA chip. WUG: (Wakeup Graphics) - you can choose a customized wakeup / startup graphic) 1314 UFS3 User's manual UI OPTION: You can double click this item to execute each one individually and immediately. SAVE USER SETTING: You can backup / save the main user setting before starting any job with the phone. UI DEFAULTS: Set the user setting back to default (Phone setting etc ) FULL FACTORY DEFAULTS: Set the phone to the factory default setting, including resetting the wakrup graphics, Security code, phone book etc INIT SIM LOCKS: Unlock the SP-Locks / Network locks SET FAID: Calculate the 'FAID', (Flash Authority ID) which must be set after flashing the MCU or PPM. Note: If this set FAID fails you will not get network on phone or cannot register to the network, or signal will up down for few seconds and will be restart it self. RESET USER LOCK: Set the user lock (Security Code) to factory default (12345) Reboot in Normal Mode: You can insert a sim card and after processing the phone will reboot into normal operating mode.
Use this to check normal operation. Please note that many USB ports cannot supply enough power for the phone to transmit, so the phone may shut down when trying to register with the network when using this feature. It is mainly to confirm the phone will power on and accept the sim card etc LCD CONTRAST: Set the LCD contrast FEATURES 3310 3315: Convert a 3310 to 3315 to enable extra menus.
(This option only to be able for 3310 with version 5.45 and above 3310: convert 3315 to Vibra On / Vibra Off: Enable or disable vibra menu for15 Action window for DCT-3 Aux functions READ IMEI: Read IMEI from the phone. READ FLASH: Use this function to make a backup of your phone firmware (Only DCT-3 models). CONVERT FILES: Convert.FLS files to original Nokia Wintesla Files. (Use this feature to convert the.fls vergin EPROM s to use with UFSx-Box). ERASE FLASH: Erase the whole flash and EPROM. After you will need to flash MCU, PPM and PMM files, (Full Flash) And rebuild IMEI etc.
('Flashing' functions will erase the correct areas automatically). CREATE INI FILE: Create the ini file to be used with 'UI Options' create Ini files make it easy for you. It means after you have choose the setting, MCU, PPM UI setting then click create ini. Next time when you want to flash for the selected models which you already created the ini you don t need to select the MCU, PPM etc.
4.1 Flashing DCT-3 phones Normally when you connect the SW you will see on the DCT-3/L Path is C:Wintesla, you have to change it to C:Program FilesNokiaPhoenixProducts if your flash files are located in this folder C:Program FilesNokiaPhoenixProducts if your flash files are in C:Wintesla then no need to change this. To Flash your Dct-3 Phones make sure you have Check/tick on 'UI Defaults' 'Full Factory Setting' 'Set FAID' also make sure power on your phone and click 'Start' button to begin flashing your phone, For dead Phone you have to manually flash the phone. 16 UFS3 User's manual 5. Action Window for DCT-4 PRODUCT: Choose your phone model, for example 3200 RH-30, 6610 NHL-4u, 6610i RM-37 MCU: Choose the MCU flash file (Main phone firmware to be flash) PPM: Choose the PPM flash file (Language pack firmware, Must match with MCU version) CNT: Choose the CNT flash file (CNT = Content Pack). This allows you to flash the standard factory wallpapers, ring tones, games and others applications supplied as standard in the hand set. PM: PM (Permanent Memory). This is the DCT-4 version of 'EPROM' but cannot be changed and reset easily.
(DO NOT PLAY WITH THIS; YOU MAY DAMAGE YOUR PHONE!) Note: If you know what you are doing then you can play with the PM. ENABLE BT FLASHING: Flash the Bluetooth firmware (BT=Bluetooth) 1617 Action window for DCT-4 BT HW: You can choose AUTO, OLD or NEW.
Defaults is AUTO, however in some cases such as some 7650 it is necessary to use OLD option if the BT function does not work correctly. UI OPTION: You can double click these items to execute each one individually and immediately. SAVE USER SETTING: You can backup / save the main user settings before starting do any job with the phone. FULL UI DEFAULTS: Set the user setting back to defaults (Phone setting etc.) FULL FACTORY DEFAULTS: Set the phone to the factory defaults settings, including resetting the wakeup graphics, security code, phone book etc. SOFTWARE UPGRADE DEFAULTS: This should be done when you have upgraded to newer Software version. INIT SIM LOCK: Unlock SP-Lock / Network lock. RESET USER LOCK: Set the user lock (Security Code) to factory defaults '12345'.
REBOOT IN NORMAL MODE: You can insert sim card and after processing, the phone will reboot into normal operating mode. Use this to check normal operation. Please note that many USB ports cannot supply enough power to phone to transmit, so the phone may shut down when trying to register with the network when using this feature. It is mainly to confirm the phone will power on and accept the SIM card and etc User setting items Phone Book: Save phone book UI Setting: Save UI setting Ringing Tones: Save ring tones Graphic logos: Save logo and graphics Write User Settings: Write back saved data 1718 UFS3 User's manual Aux function Read UEM: Create an.ASK file. Write UEM: Write a.RPL file. Write PM: Write a PM file PLEASE DO NOT DO EXPERIMENTS WITH THIS FUNCTION, YOU MAY DAMAGE YOUR PHONE.
IF YOU KNOW WHAT YOU ARE DOING THEN YOU CAN PLAY WITH THIS PM. PLAY AT YOUR OWN RISK Erase Flash: Erase the whole flash! Note: All flash will be erased, inclusive the PM area, you may damage your phone! Create INI file: Create the ini file to be used with 'UI Options'. Create Ini files is to make easy for you it means after you have choose the setting, MCU, PPM UI setting then click CREATE INI. Next time when you want to flash for the selected models for which you have already created the ini file.you don t need to select the MCU, PPM or etc what you do is just click flash or start. For DEAD Phone click flash and for normal phone click START.
5.1 Flashing DCT-4 phones To flash DCT-4 Phones 'Working Phone' Connect cable and power on the phone. Select correct models MCU & PPM and both must be of same version. Tick/check on the UI setting that you wish to and press start. To Flash Only PPM choose the proper PPM version as the MCU version of the phone. If you don't know the phone version it is better before doing anything power on the phone and press.#0000# to view the phone version or with SarasSoft just click 'info' button, you will get the MCU and PPM Version of the phone., select the PPM version and Click Flash. If the Phone is DEAD after selecting the MCU & PPM remove tick mark from Auto Detect and click 'Start' button CNT = Content Pack.
If you have check/tick on check box it means it will flash CNT to your phone. CNT is the file which will install Original Ring tone, Wallpapers, Graphics, if you have failed to extract the CNT, your phone will not have wallpaper, ring tones etc. Action window WD-2 Symbian phone Action window WD-2 Symbian phone All function is mostly /basically the same as the DCT-4 Please see the previous section for more Details. FORMAT USER AREA: This function is to format phone user area. Example: Normally WD-2 phones faults like 'CONTACT RETAILER. Just Format the User AREA to solve the problem.
6.1 Flashing WD2 (Symbian) Phones For WD2 Symbian like 3600, 3650, 3660, 7650, 6600, N-Gage and N-Gage QD this mention models have COMBO flash for Chinese package. Landini r4000 tractor manuals. Normally MCU and PPM is same which means all MCU s end by C1 and some of them is C5. For Example: MCU Nhl c1 and PPM Nhl you have to flash both for English and others language and for Chinese Package (COMBO FLASH.) which end by C2, C3, C4, C5, C7, C8, C9.
You only have to flash the PPM area only. COMBO FLASH - MCU & PPM is built in one flash; it means no Separate MCU or PPM for this Chinese Version. Note: DO NOT CHECK ON 'Enable BT Flashing' if you are flashing WD2 phones. After the Flashing is finished; manually Reset or Format the phone by Pressing.#7370# on the phone and the security code is '12345' (Original Code). 1920 UFS3 User's manual 7. Action window DCT-L 'COMMUNICATOR' All Function are same as DCT-3, Please see the DCT-3 section for details. 2021 Problems & their solutions (DCT-3) 8.
Problems & their solutions (DCT-3) PROBLEM, '1st Boot Err: Bad Resp DCT3' This error says that box cannot communicate with the phone via Flash-Bus interface. Check cables by schematics, use 'beeper' here to make sure that all wires Are 100% connected and well crimped. If you have this error on 5110, 6110, 6200, 7110 phones be sure that you are using Dct-3 cable, Dct-4 (6310) cable has different schematics and cannot be use with DCT3 phones. Check if phone can communicate with box via M-Bus ('info' Button) 4. Make sure that box empowering phone, then press 'Check' button, left LED power must switch off for 1 sec. DCT-3 phones must power-up automatically when connected to the box, Box must be in Dct-3 Mode. Also when you click on 'Check' it should power-up DCT-3 phones.
Then switching between DCT-3 and DCT-4 modes phones must Power-Up. PROBLEM, 'Contact-Service' on LCD This error cause few reasons: Firmware Checksum Error 1. Try to use slower Flash-Bus speed, Not all phones support 'FAST' 2. Did MCU software version matches with PPM version?
If 3310 or 3410 phone, did you use last version of DCTx, With 'Erase 'hole' option selected. PPM area corrupted 1. Make 'UI defaults' and 'Set Faid' 2. Make 'Init Sim locks' 3. Make 'Rebuild IMEI' (after 'Rebuild IMEI' must repeat steps 1 and 2) 4. If error still present try Flashing PPM area with virgin PMM content (PPM= EPROM area) WARNING: All original Radio setting, User Setting, IMEI will be lost, we highly recommend to backup PMM before ('READ FLASH').
After PMM Flashing must do 'Rebuild IMEI' and steps 1, 2 Hardware Fault 1. Check COBBA S/N ('Info') if number COBBA is faulty. (Some patched software also gives COBBA S/N:, Try Reflash) 2. Defective Flash Memory Chip Normally this gives erasing or writing error while flashing) 3. Defective MAD Asics, CCONT Asics. Problem No Radio Coverage 1. Always make 'Set Faid' after flashing 2122 UFS3 User's manual 9.
Problems & their solutions (DCT-4) Problem, '1st Boot Err: Bad Resp UPP, 0X FF FF 72' This error says that box cannot communicate with phone via Flash-Bus interface. Do all steps as described in '1st Boot Err: Bad Resp DCT3' topic. Here 0X in response string gives some information: 01 - Mobile not powering-up 02 - Mobile not enter flash mode 03 - UPP not Respond Note: DCT4 phones must start in 'LOCAL' mode when powering-up. Problem Erasing or Flashing fails in middle of process 1. Check cable, especially BSI wire (RJ45 pin Dummy battery) 2. Try slower Flash-Bus Speed 2223 Problems & their solutions DCT-4 WD2 (Symbian) Phones 10.
Problems & their solutions DCT-4 WD2 (Symbian) Phones Problem 'Contact Retailer.' Or blinking 'NOKIA' on LCD WARNING: Never do 'UI Factory Defaults', 'Full Factory Defaults', and Software Upgrade Defaults'. Use these functions only when the phone fails.
Do 'Full Factory Defaults' 2. Switch phone to 'Normal' mode (Can fail here) 3. Switch phone to 'LOCAL' mode.
Do 'Format User Area' (This process may take about 30sec.) 5. Switch to 'Normal' mode. If Fails repeat step 1-4, check if match MCU and PPM software version Note: WD2 phones booting is slow, so please be patient here, and don't do these steps fast.
If phone doesn't enters 'Local' mode when connected or after flashing, Please check cable with schematics (BSI wire) here must be serial Resistor on BSI (3.3kom) Here described are only most frequently common errors. Nokia 6600 MCU, PPM, BT, Format Step By Step 1. Select the MCU and PPM file, speed choose 'Normal' 2. Press 'Start' Button to do the job 3. When flashing is done, choose 'Normal' in UI Setting, after that can see the 'Init Normal Mode OK' in the software. Choose 'Local' in UI Setting, after that can see the 'Init Local Mode OK' in the software.
Press the 'Format User Area' Button, after that can see the 'User Area Format OK' in the software. Done and Contact Retailer: Managed by this way 1. Flash phone (MCU & PPM selected) with speed set to normal- UI options set to full factory. Do not use.ini settings. And disable auto detect 2. Power up phone-phone says contact retailer 3. Put in Normal Mode 4.
Format user area-gives error cannot format 5. Put in Normal mode-phone resets with insert sim card tested - phone 100% working with full signal 2324 UFS3 User's manual Simple Solution for 6600 'Contact Retailer' or '4blinks' Step 1: Click ERASE Flash Start address: End address: 027FFFFF. If you get an 'Erase Flash Error' message in a specific address in the flash IC, this means that you have a damaged flash IC. You will need to replace flash IC number 2 inside the phone. (The 6600 has 4 flash ICs inside). Step 2: If you are successful in erasing flash IC number 2, make a full flash of the phone. MCU, PPM & Bluetooth If required Step 3: If you are successful in full flashing the phone, put battery inside phone and you SHOULD GET 'Contact Retailer' message again.
Now remove the battery, put it back and hold buttons 'Call (green button on the left)' + '.' + '3' then press the power button while still holding the 3 buttons above The phone should start formatting itself (note that there must be no sim card inside the phone while doing this.) After formatting, phone should be ok. But need to update a good PM file if necessary.
2425 MOTOROLA-ACER Unlock 11. MOTOROLA-ACER Unlock Step 1: Select the model Step 2: Connect the phone Step 3: Power on the phone Step 4: Press 'Read Info', (Software will show the version and IMEI) Step 5: Press 'Locks', it will display Lock Init Done. Note: For Unlocking, etc don't power on the phone, before connecting the cable MOTOROLA-ACER Flashing 1. Select mobile brand 2. Select flash file (MCU, LP) 3.
Mobile off and connect cable 4. Press 'Write Flash', box green light will blink 5. Press power button of the phone will flash, when the phone is flashing the red and green light will blink. After flashing is complete, press 'Defaults', the green light will blink 7. Press power button of the phone will show defaults done 8. Select flex file 9.
Power on the phone and connect cable 10. Press 'Write Flex' 25. 26 UFS3 User's manual 12. SONY-ERICSSON Unlocking 1. Run the UFSATRZ.exe, You will see the software as shown in the screen shot. Select the Model and Click 'GO' button and the 'IDLE' will change to 'MOBILE READY' after booting the mobile.
You will see in the software the Phone info. Click on ' INIT LOCKS'. 3.1 For Z200 select unlock file 'z200custstd.bis' or 'z200custvirgin.bis' in Cust and click on 'flash cust'. Alternatively for auto unlocking select 'Unlock' in 'Scenario' before you press 'Go'. Confirm If mobile does not power on automatically, follow the instruction: 1.
Power on Mobile, if it does not power on then. Reattach Battery and Click Yes. Unlock Done, In the Software Screen will show CST Flashing Done, Time: 00:06 Restarting. Init Done, Time: 00:04 All Done, Total Time: 01:00 (Your Phone has been unlocked and can be use with any operator.) 2627 13. Flashing SONY-ERICSSON phones Flashing SONY-ERICSSON phones For Flashing SE Phones, Some phones need to flash MCU and Modem and Some only Need Modem it depends on the phone Type. There are two software for SE models which are ATRZ and RTP.
Flashing in ERICATRZ To flash Phone for e.g. SE Z200 Select the desire language flash file (200125720r6ccon3.bis in Mcu Part1 & Z200125720r6cfix3.bis in Mcu Part2) Select MCU in scenario Connect the handset and click on Go It will start flashing the phone, when flashing is completed it will show Flashing Done. Click on Stop button and disconnect the phone from the cable. Flashing in ERICRTP Flashing in ERICRTP is also simple as in ERICATRZ, These are the few steps to follow Open the ERICRTP software and Select the Model you want to flash Select Mcu file (T610125577r4c003emea6.bis) & Modem (T610125562r4c003modem.bih) Select Mcu + Modem in Scenario Connect the handset & click on go Click on Stop & Remove the handset after it show flashing done on the screen 27.
28 UFS3 User's manual 14. SONY-ERICSSON RSA phones Flashing SONY-ERICSSON RSA Phone is similar to that of Non RSA Phones, Here are some additional precaution to be taken while Unlocking & Flashing just follow these steps 1. By checking the phone version you can identify whether it is a RSA base phone or Non RSA phone, you can do this by pressing.